Contact me

confessionsofasinger@hotmail.com

Seguidores

Mostrando entradas con la etiqueta Dress. Mostrar todas las entradas

lunes, 25 de octubre de 2010

The dress


Se que he estado un tanto desaparecida. Unas pocas/os me lo habeis dicho por mail/trendation y otras en persona, lo cual me ha hecho ilusion que haya gente que lea el blog con tanta asiduidad.

La verdad esque no he estado haciendo mucho, simplemente tenia que asentarme en el nuevo curso, y supongo que otras cosas han tomado prioridad, pero por poco tiempo. I'm back in tracks, Y dispuesta a quedarme! Con nuevos propositos aunque no sea año nuevo, pq cuando te das cuenta de que hasta tus mejores amigos actualizan casi a diario y tu ni te enteras... algo no marcha:

1. Leer el News Feed a diario.

2. Volver a comprar revistas de moda. (Estoy totalmente out de las tendencias de esta temporada)

3. Coser, coser, coser.

4. Cuidar el blog mejor que a mi misma...

5. Investigar nuevos patrones. Si, se que ya huele este básico, pero me encanta.

Asi que para.... celebrar? esta nueva etapa, ahi va un patron en el que he estado trabajando, y cosiendo. En cuanto encuentre el cargador de la camara, hare fotos de los nuevos vestidos, pero hasta entonces, estoy sin imgs, ya que la resolucion de mi blackberry sucks.

-------

Partiendo del patron base femenino, construimos este vestido.

1º) Marcamos la cintura. ¿Como? Con pinzas. Ya lo hicimos antes, ahora es utilizarlas en la cintura. Asi marcaremos 1/4 de la medida de cintura + 2cm con las pinzas.

2º) Añadir la bajada de cadera. Desde el punto B, bajar 1/3 de cadera + 5. Esta sera tu bajada de cadera.

3º) Dibujar tu falda. La medida sera la de tu cintura + 2cm. (Si quieres que tenga fruce añade 20cm a la cintura de la falda)

4º) Cortar tu espalda en dos piezas.

5º) Cortar el delantero doble.

6º) Unir las piezas del delantero con la espalda.

7º) Unir falda a la parte superior.

8º) Coser cremallera en la espalda.

9º) Unir hombros.

Si quieres añadir mangas es mas facil hacerlo antes de unir los hombros.

Ya se que aun no hemos hablado de ellas, pero pronto actualizare. Ahora intentare hacerlo con mas asiduidad, con nuevos tutoriales y todas las cosas que estoy cosiendo.

Hasta entonces, dudas al mail como siempre :D

viernes, 23 de abril de 2010

Finalmente he conseguido simplificar al máximo como hacer un patron de cuerpo femenino. Es decir, el patron que utilizaremos para hacer la parte de arriba de los vestidos.

He estado leyendo muchos tutoriales online, de cómo sacar tu propio patron, pero como siempre son liosos y utilizan un lenguaje muy técnico. Asi que durante los siguientes posts vamos a ver todo lo que necesitas saber para hacer el patron base de vestido.

En primer lugar las medidas utilizadas:

Circunferencia de Busto: Seria la medida de tu cincunferencia de pecho.
Tórax máximo: Circunferencia de Busto + 2cm
Circunferencia de Cintura:
Tu circunferencia de cintura.
Estatura 7a: es la medida desde la nuca al suelo. Es decir tu altura menos tu cabeza.

Ahora las medidias que usaremos a lo largo del tutorial:

Talle: 3/10 de estatura 7a
Pecho: 1/2 perimetro de pecho
Base: 1/2 circunferencia de pecho + desahogo.
Tórax: 1/2 de tórax.
Cintura: 1/2 de cintura

Buscando y rebuscando, he encontrado diversos tutoriales que me han llamado la atencion. Por ejemplo en algunos te recomiendan medirte holgadamente.
NO LO HAGAS.

Me gustaria pensar que esta indicacion es para crear los desahogos. Bueno, pues es tan facil como añadir el desahogo deseado a tu medida real.


INSTRUCCIONES PARA LA ESPALDA:


Instrucciones basadas en el sistema Jordi Camps y Marti.
Img y algunas instrucciones: mailxmail.com


Y EN EL SIGUIENTE POST EL DELANTERO!!

(Ya sabeis lo que dicen, visteme despacio que tengo prisa ;D )

P.S For all of the people that read this blog and don't speak spanish I would update with the same tutorial in english soon, I just thought it would be easier this way.

-----------------


Y esto es lo que llevaba hoy. Se que no suelo actualizar con outfits no relacionados con lo que hago, pero ha sido mi total despedida al invierno, y una mala idea que me ha causado sudores a escalas diferentes mientras iba por la calle. Pero bueno, era uno de esos conjuntos que te vuelves a poner pq te gustan, eso si, se acabaron las chaquetas y las dobles mangas hola americanas de colores y shorts con calcetines.

------

En otro orden de cosas me gustaria dar las gracias a Fashion Freak por el premio. Lo puse a la derecha del blog hace tiempo pero creo que siempre se me olvida mencionarlo. Ahora tienes tu propio Link y mi eterno agradecimiento. Tu blog es lo mas y tu tienda ni te cuento. Ya estoy echando un ojo a la nueva remesa de zapatos.


domingo, 28 de febrero de 2010

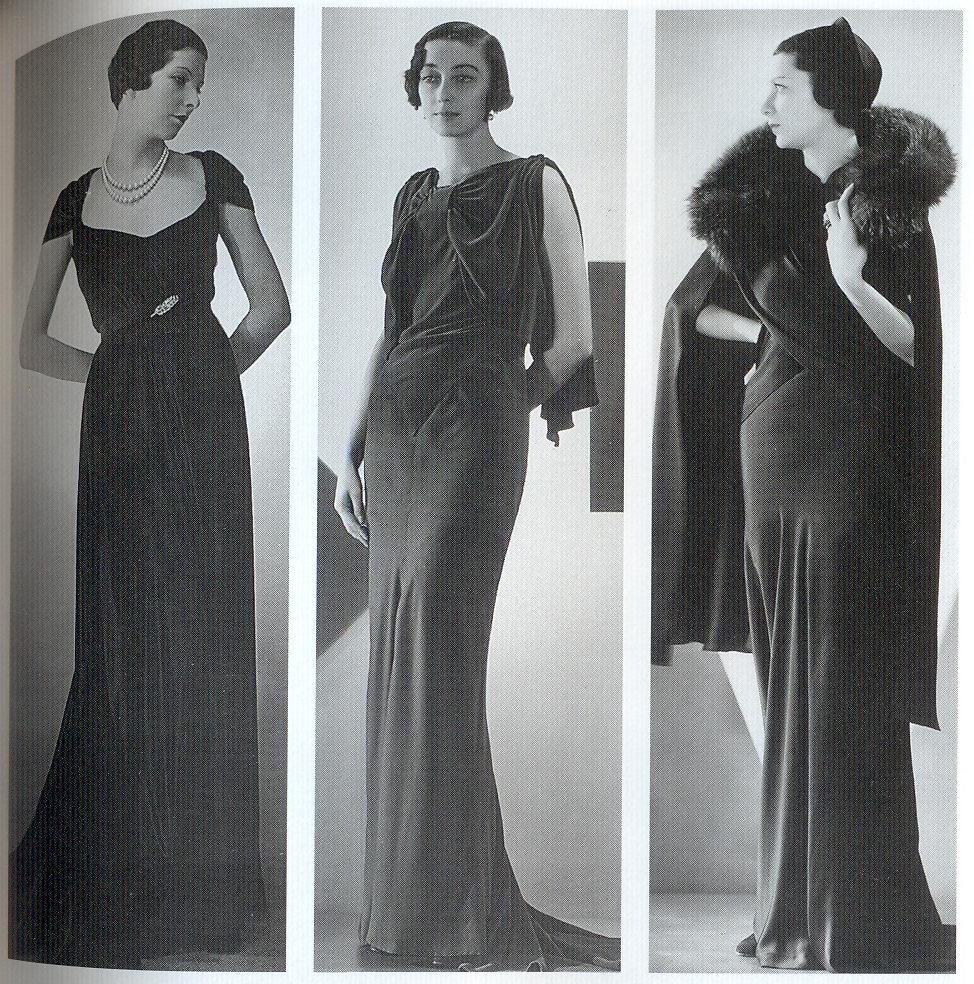
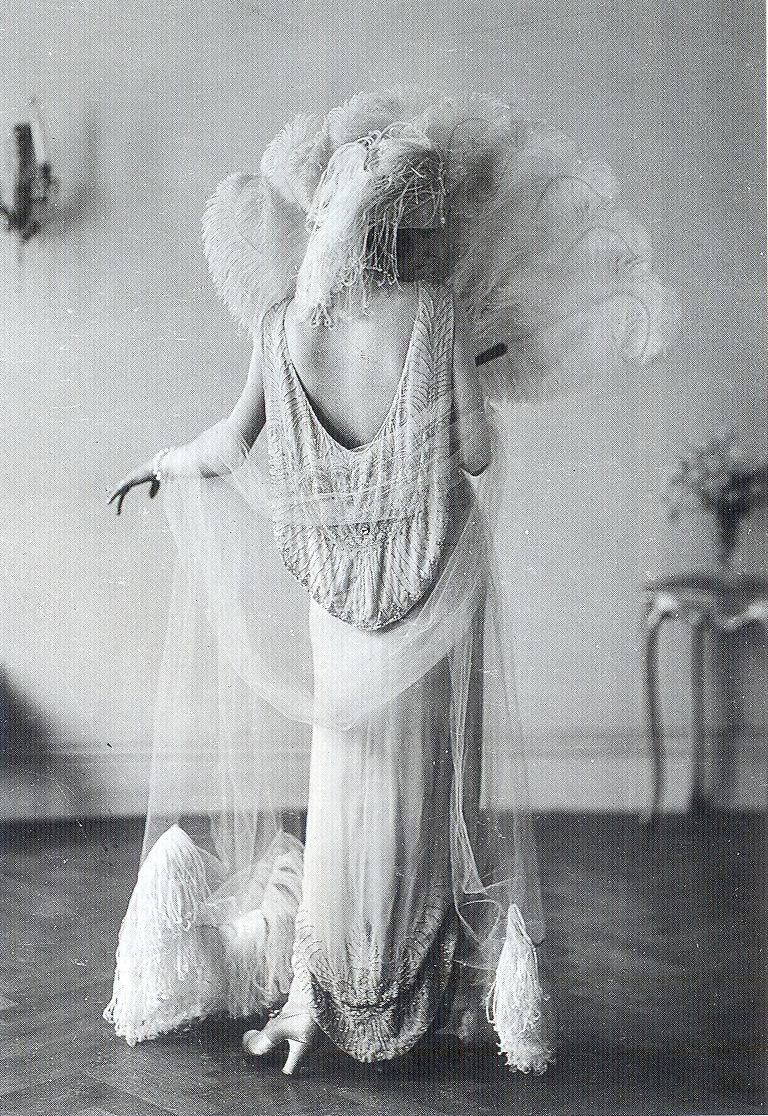
Month's Obsession: 30's evening gowns.


I know I'm supposed to be writing the second part of the tutorial, but I lost a piece (again), my machine is making a weird noise (Is starting to bum me out) and I have this huge test tomorrow.

So I've decided to post some inspiring images of the 30's, because I love that era and actually was my costume for this year's Carnival party. (Amusing how so many people recognizes the 20's but not the 30's.)

I don't really use to dress up for this kind of parties, I use to just put on a wig for the fun of it, but this year I kinda got inspired while downloading some books of this amazing page. http://vintagesewing.com

It actually teaches you some really good techniques of sewing and, great ideas of how to build a wardrobe, and my favorite ones: tutorials of how to make hats and patterns of clothes of different decades.

As I was reading I discovered that the fashion in evening gowns had changed. I know, I should had figure that one out back in College, when I took Fashion History... but yet again, I rarely attended that class.

In the 30s, the feminine silhouette came back; bosom, and hips were clearly defined by the shape of the clothing and the waistline returned to its natural position.

And my favorite part: bare-backed gowns! Now, that's gorgeous. Actually that's what I told the two girls that asked me for a dress: You're gonna go bare backed.

This is what I wore to the party, a red dress I found in a street market and that I restored to look more 30'sly? Wow, that's a word... cause the blogger Spell check is not marking it.... Amazing.

Anyway, all I did was to tie a belt of the same color in my waist, making two holes in the sides so I could mark my waist and leave the back bare. It looked so good, and I would love to have more pictures but it was freaking cold and I didn't take the jacket off at any moment. Let's hope next time I wear it, is hotter outside because I'm totally going to wear it so many times this summer and I would make photos and update them in Trendation or here, because I simply love this piece of fabric and I think it could look great with Docs and a denim or leather jacket.

The party was not the party of the year, but if you wore a costume you had beer and a tapa for 50c.

All I need to say is that I sported my costume with dignity until 2 am when vowels stopped to be a part of my vocabulary and I started to ramble to whoever that asked me about the dress about the 30's.
As I'm doing right now. So I think I'm going to shut up and come back to study, because one of this days, I actually want to graduate.